We have seen countless Wix ads claiming that a user can make a website in no time. They claim you require little to no web development knowledge to create a website and start your online store on their platform.
With this tutorial, you’ll find how true their claim is.
That being said, let’s see why you should pick Wix, among many other eCommerce platforms.
Why should you choose Wix?
Undoubtedly, you would want to set up an online store as it will offer a boost to your sales. However, developing a website on your own is not easy. Getting a web developer is not economical for small businesses, especially if you’re doing online business for the first time.
Additionally, if you make your eCommerce site using a free eCommerce platform or scratch, you would need to maintain its back-end functionalities and, most notably, the security by yourself or hire somebody to do it on your behalf. Again, for small businesses, this is not feasible!
In such a scenario, an eCommerce platform such as Wix can help you create an online store and maintain it on your behalf, whereas you can focus on running your business and fulfilling the orders.
Sounds interesting? Well, then, let’s start building your online store on Wix.
Step-by-Step Guide to Set Up Wix Online Store
Here is a guide that will help you create an online store through Wix and provide step-by-step instructions to enable you to bring your business to the Internet.
Step 1: Create your Wix account
The first step towards building your website involves registering yourself on Wix. To do this, go to wix.com, enter your email address and click the “Start Now” button.

Clicking this option would prompt you to create an ID on Wix.
Enter the details, and you are all set to go ahead and start building your online store website.
Step 2: Tell about yourself
Once you click the “Get Started” button, Wix will take you to its Artificial Intelligence Designer. It would ask you a few questions to determine what kind of website you want to create.

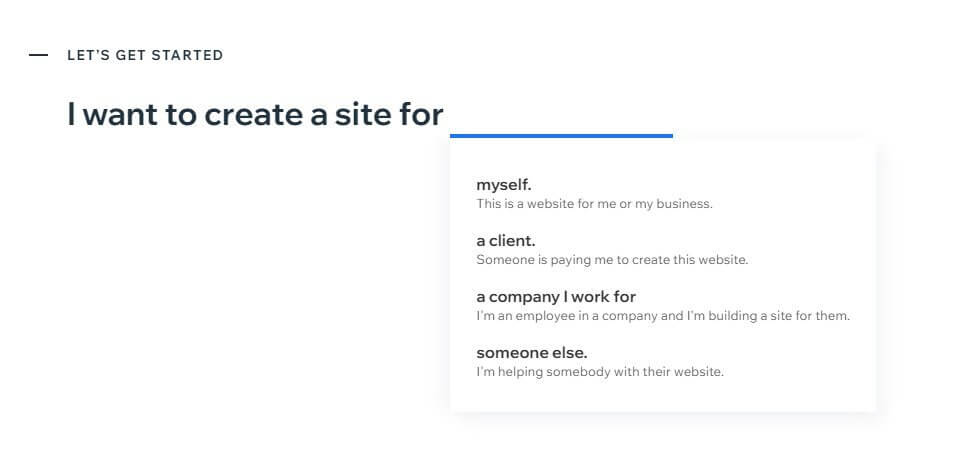
The tool would ask you for the purpose of the website. It would offer you choices such as “myself,” “client,” “a company I work for,” and “someone else.”
If you are making it for your business, choose “myself” or other options.
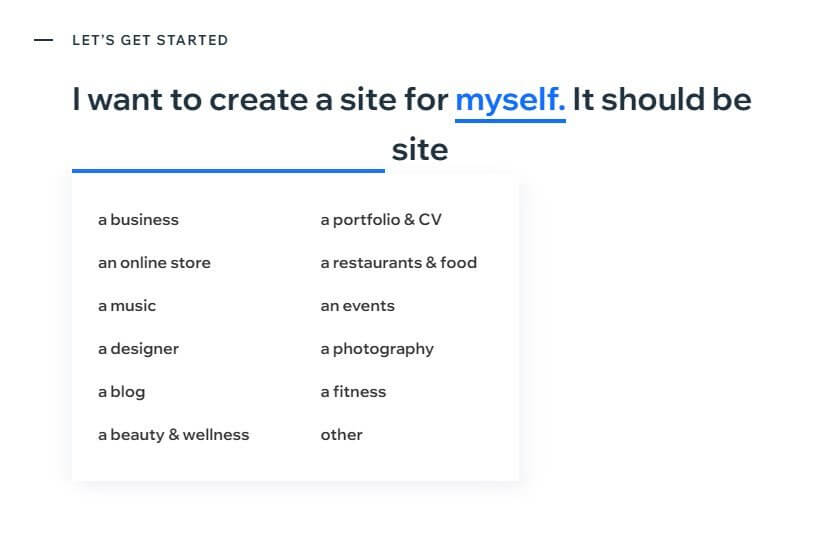
The next question would be about the nature of the website. Here you need to choose “an online store” as the desired option.
Similarly, you would face one more simple question. Answer it to help the system determine the best template for you.
Step 3: Let AI create your website
Once you are done with the questions, Wix will confirm if you are comfortable with the website made by the Artificial Intelligence Designer or want to take matters into your own hands.
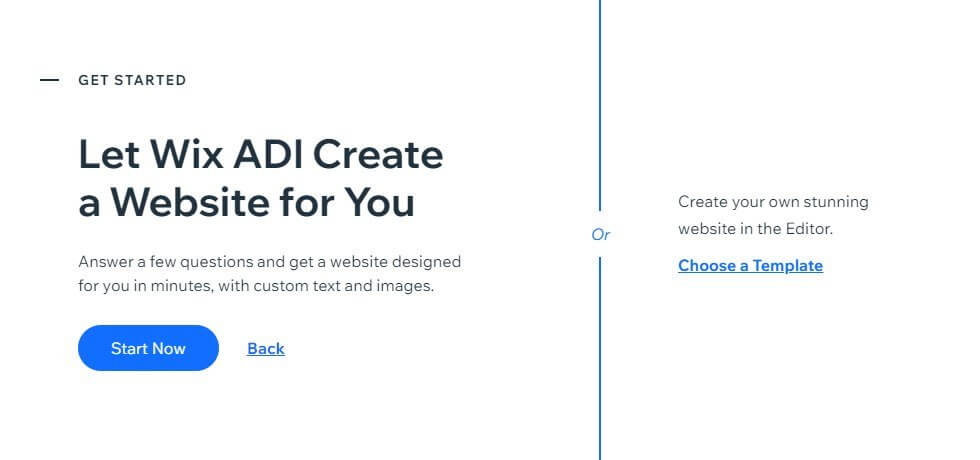
There is no pressure on you as you can change the look of your website later. If you are uncomfortable with choosing the website’s design, go with the Artificial Intelligence Designer’s website.
Note: For the purpose of this guide, we have assumed that you are going with the suggestion offered by Wix’s ADI.
Step 4: Select the business type & features
After selecting the option to go with the ADI, Wix will ask you a few more questions.
The first question would ask you about the type of business you run. Choose the appropriate option, and you will see the next question.
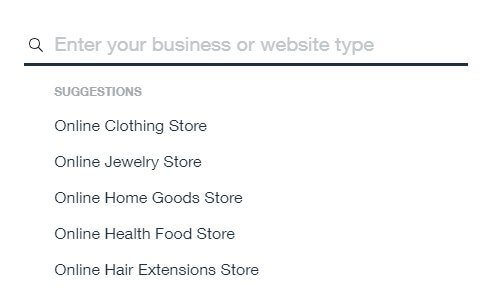
Next, based on your selection, Wix would recommend and come up with a set of features that you might want on your website based on your selection.

You can choose options such as a blog, chat segment, Email subscription, and other features you want to see in your store.
Lastly, Wix would ask you to give a name to your website. Once you enter the title, your website is almost ready.
Afterward, Wix would also ask if you have some content, you would like to bring to your new website. You get an option to import content from your existing website or even from Google Places listings. In most cases, importing content doesn’t yield great results, so skip this option.
Now, review and edit the information you have entered and click Next to confirm.
Step 5: Pick a theme for your site
You don’t want your website to look bland. As a result, Wix offers hundreds of templates for you to choose from, but it doesn’t want to overwhelm you with the options.
So, it takes this process in a stepwise manner. The first thing that you need to do is select a theme.

Once you select a theme, Wix comes with a few different looks for your homepage. Wix designs these homepage options depending on your choices during the question-answer phase. Choose the option that suits your need the best.
Remember, you can always change the appearance of your website.

In the next step, add other necessary pages to your site. Wix showcases all the essential pages in the same design as the homepage design that you picked in the previous step.
Just click the “+Add page” button above all the pages you want to add.
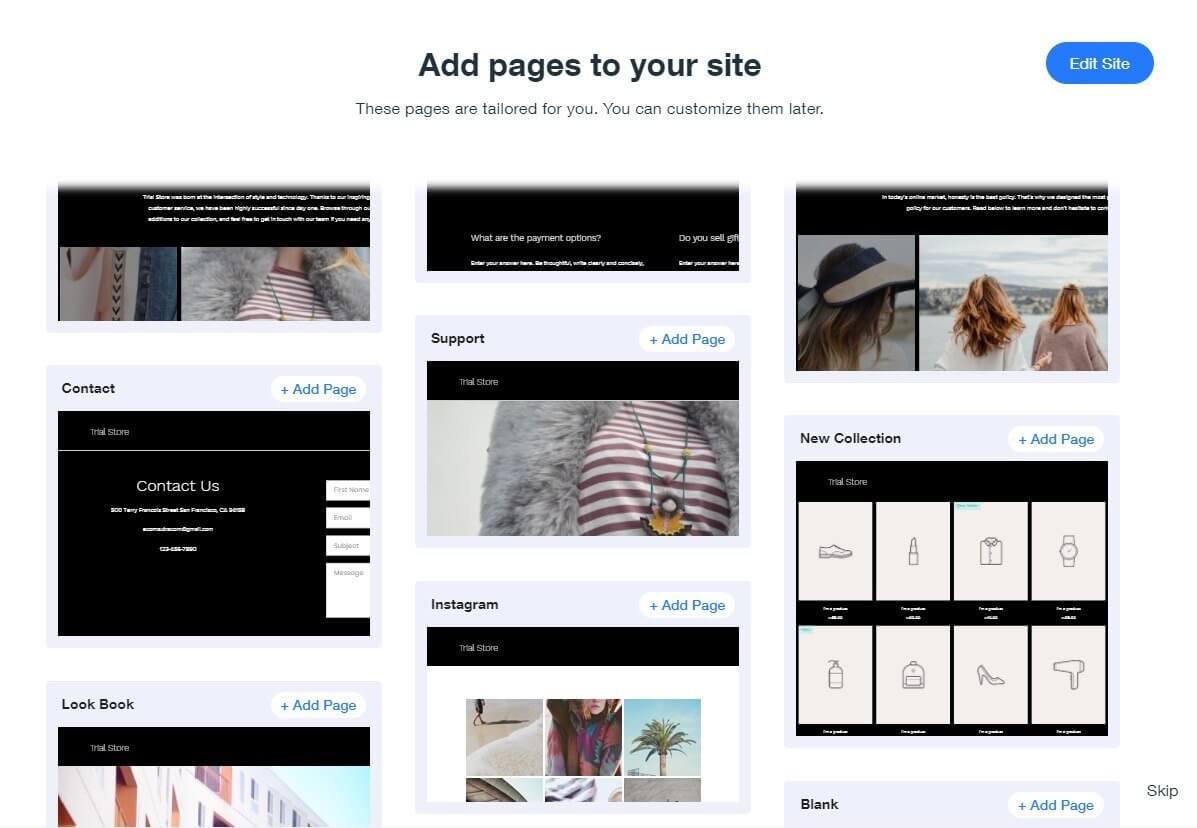
The most important pages are “About,” “Contact,” and legal pages.” There are various other pages, such as “testimonies,” “reviews,” etc., that you might add to make your website better.
Select all pages available and add blank pages for other pages you want to add to your site.
Now, click the “Edit” button to go to the customizer section, where Wix will let you change the website’s layout to the tiniest detail.
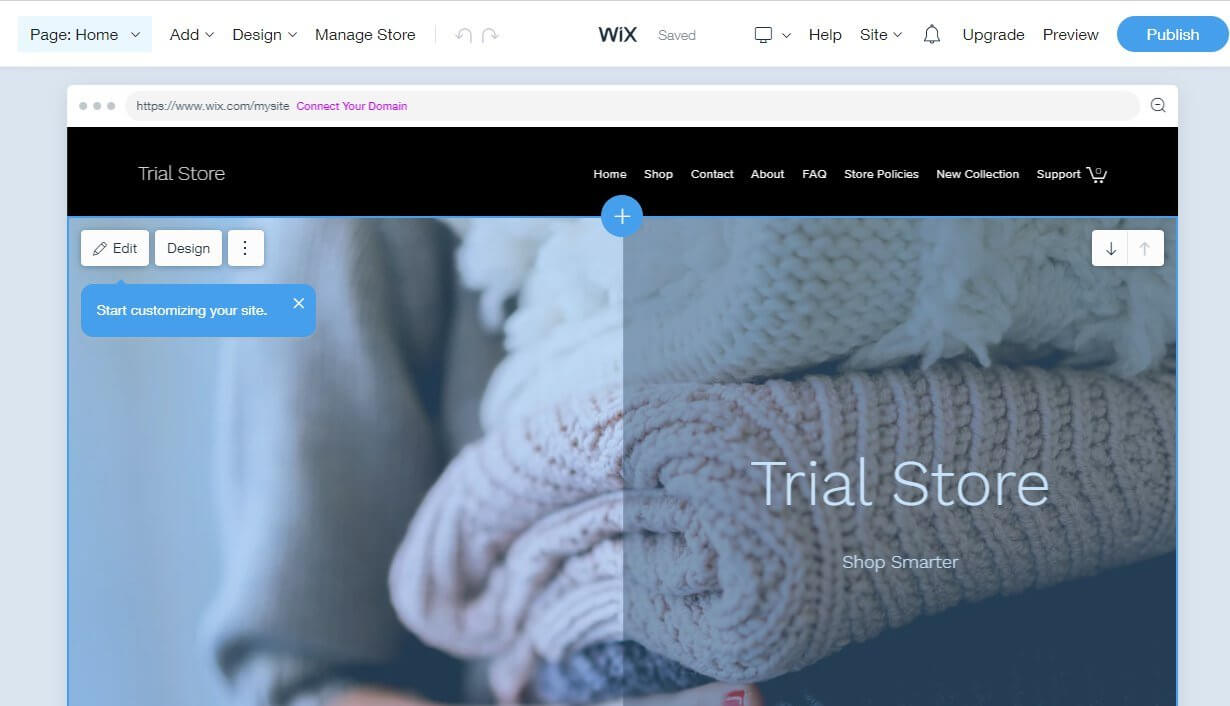
Go to each page and update the content, including images, wherever needed. Here’s how you can edit the About page.
To add the “About” page, click on the “Page: Home” and then select the “About” page that you added in the last step.
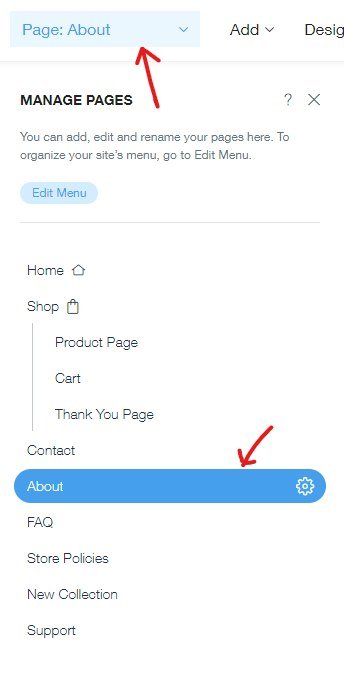
If you missed the last step, click “Add” and select the Page option. Wix would give you suggestions about the pages you might want to add to your website. Select the “About Page.” Wix would give you some design options. Choose the one that you like the best.
Similarly, you can edit (or add) other pages, including Blog and FAQ pages.
Keep experimenting with the options (colors, features, etc.) until you get the desired results. And once you are satisfied with the web store’s design, proceed with tuning the website for mobile devices.
Step 6: Optimize your site for Mobile Devices
Today most people use their smartphones and tablets to browse the web. As a result, you need to optimize the website for mobile phones and tablets.
Wix allows you to do that with just a few clicks. To look at the website’s mobile version, click on the “view switcher button” and select the mobile display.
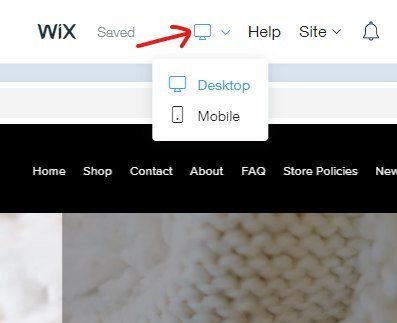
Clicking on this option would transform the website into its mobile version.
In most cases, the website would look great in its mobile version. If you don’t like the mobile website’s look, you can change its appearance slightly so that the website highlights the essential aspects.
Any changes you make to the mobile website are exclusive to the platform and won’t affect your website’s desktop version.
Step 7: Add store and other elements to your site
Now, your primary website is ready, and it’s time to add the store page to your site.
Like the other pages, you can add a store section by clicking on the “Manage Store” option.
Now, a dashboard will appear from where you will manage your store orders and website settings.
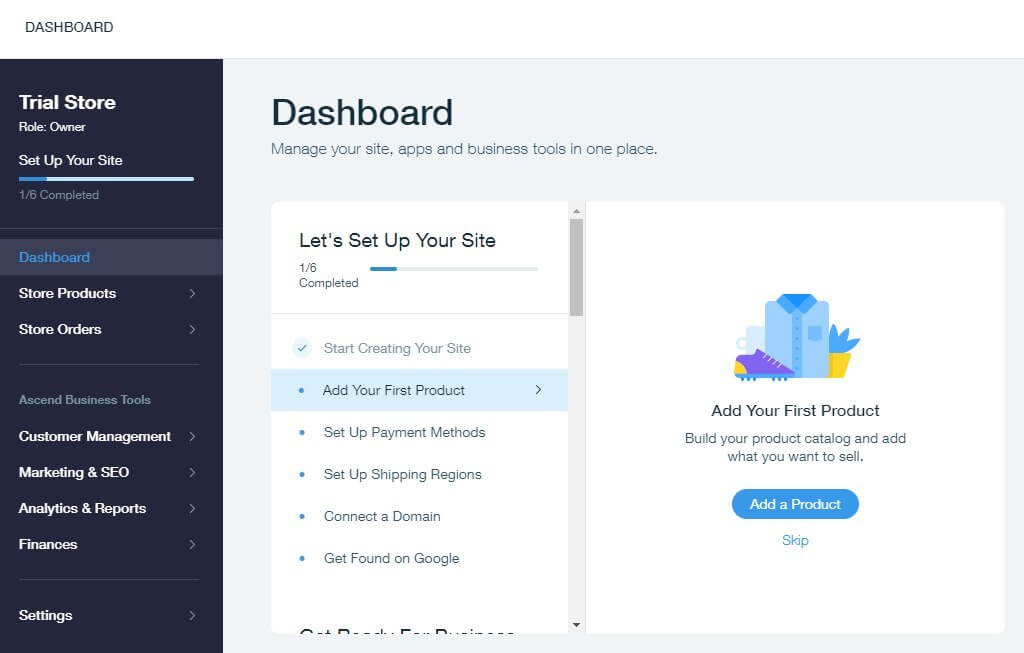
Since the page designs and layouts are already created, you have to follow a few steps before making your store live. These steps are as follows:
- Add all your products.
- Setup Payment methods
- Set up shipping Regions
- Add your business info.
- Set up store tax calculations
Complete these steps, and your store will be ready to be live.
Step 8: Get your online store live
To publish your website, open the ADI editor (access it by clicking on “Edit Site” at the bottom left portion of the dashboard) and click on the “Publish” button.
Wix would offer you a Wix co-domain and an option to use your domain. Choose the one that you prefer to use.
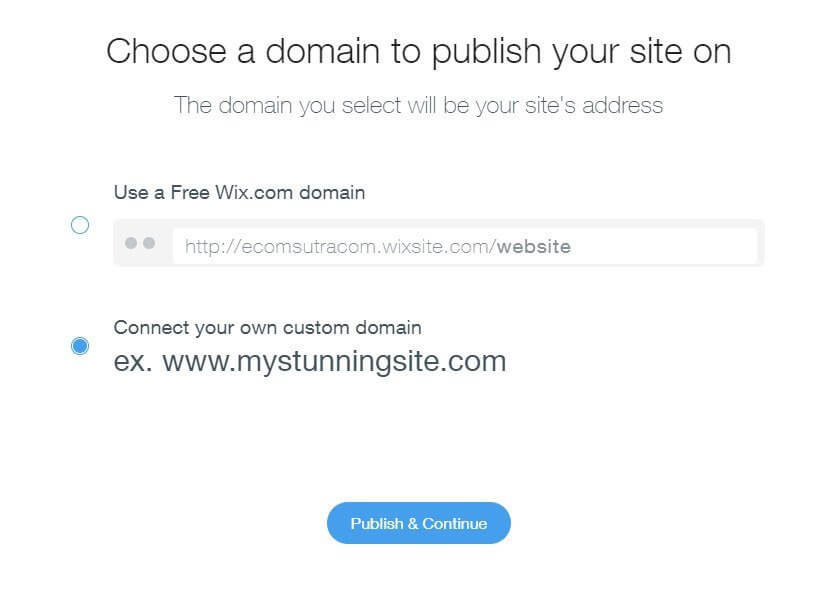
If you opt for the Wix.com domain, select it and click publish, and your store will be live.
On the other hand, if you opt for a custom domain, you must first purchase the domain name from domain registration websites like GoDaddy, then enter it in the box.
Next, click the “Publish & Continue” button to choose a premium plan to make it live.
Wix offers separate plans for eCommerce sites called Business and eCommerce. It comprises four plans: Business VIP, Business Unlimited, and Business Basic. The basic plan costs only $23/month.
Choose the “Business Basic” or “Business Unlimited” plan if you are a small store owner.
Once you are done with the plan, your website is ready to be published.
Congratulations!
Once the site is published, Wix will now maintain your site as long as you are subscribed to the plan. It will handle the traffic, payment, and other options for you to focus on developing your business.
You can now focus on marketing and growing your business instead of worrying about the maintenance and security of the site.
Ready to Start your Online Store on Wix?
You might also be asking yourself whether investing in an online store is a good idea or not. The answer is, having an online store is a great way to boost your business.
It allows you to serve your local customers and helps you reach people who don’t live near your physical store.
An online store would increase your outreach tremendously and provide a generous boost to your business as people are more interested in buying products from the comfort of their homes. So, if you come up with an online store now, you will see that it will attract more customers than your physical store.
Now you have seen creating and managing an online store on Wix is fast and easy, and you don’t need any technical skill to use it. So, if you want a hassle-free website to start selling your product and services over the Internet, Wix has covered you.
