Squarespace is a popular drag-and-drop website-building platform that offers a ton of mobile-optimized and customizable themes for online stores. It offers dozens of eCommerce benefits, including unlimited product listing, flexible product variants, gift cards, and abandoned cart recovery.
Another great thing about Squarespace is that it offers a free domain for the first year of your subscription, and over that, it has very cheap plans to get started with. You can read our detailed Squarespace review to learn more about its features and functionalities.
10 Steps to Set Up Squarespace Online Store
Now, let us walk you through every step of creating an online store on Squarespace. We will share all the best practices and helpful tips to ensure that you are starting off on the right foot.
Ready? Let’s get started.
1. Create Squarespace account and choose a template
Go to squarespace.com and click on the “Get Started” button. Afterward, choose one of the online store templates to get started.

Squarespace offers hundreds of unique templates that let you create a website for your business with just a few clicks.
You can customize all the templates to suit your design needs. So, take some time and preview the templated to find the perfect one that matches your store.
Once you have selected your template, click on it to get started and then create your account using your Google account or other options.
2. Add your site title and logo
Next, a pop up should appear where you have to enter your Site title and click continue to move forward.

After that, Squarespace will walk you through the next four steps, which you skip right away or keep clicking the “Next” button.
Now, you are on the Squarespace dashboard. To add the logo of your store, you’ll need to edit the header first.
Click on the “Edit” button on the left corner of the editor.

Now, hover over the header of the site and click on the “Edit site header” button.

Next, a pop-up toolbox will appear. Select the “Site title and logo” option and upload your logo file.
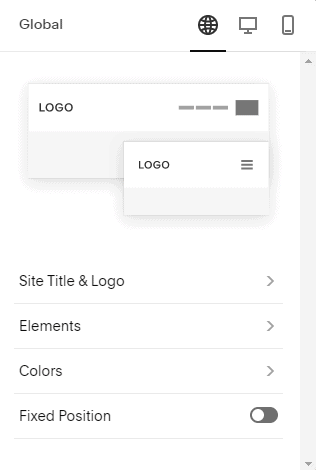
After uploading the logo, you can adjust the logo height. You can also add a different logo for the mobile display.
3. Add Necessary Pages to Your Website
A website has multiple pages, and at the moment, you have only got a homepage on your website. If you want your website to attract customers, you need to add sections that provide information to the customers.
Add an About page, a Contact page, and other legal pages to your website. You will also need to add a store page, but we will come to that part later.
To add pages to your site, go to the “Pages” section, click on the “+” sign beside the “Main Navigation” option. Then, select the “Page Layout” option from the dropdown menu.
Now, either select the “Add Blank+” option or one of the page layouts to create pages. One clicking a layout option, you will see several templates for each page; select one, edit it, and publish.

Similarly, create as many pages as you need to show on your site. While editing, you can also see if your website looks good on the mobile platform or not and edit accordingly.
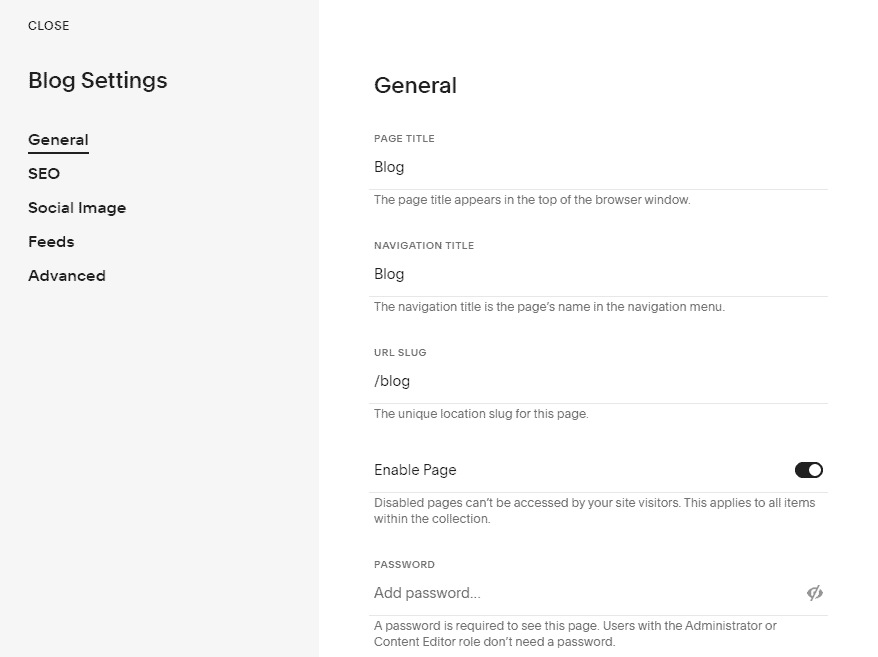
Once you are done adding the pages, it’s time to update your blog page’s setting. The Blog section is added by default, which you can delete, but it is highly recommended to keep it and update its settings.
Just go to the “Pages” section and click on the edit icon beside the “Blog” label. A popup will appear where you can make all the necessary changes like Blog page title, meta tags, social image, etc.
Now, let’s start to create the store section of the site.
4. Adding Products to the Catalog
Your site is nearly complete, and all you need to do is add the products and services you want to offer.
To add the products, go to the “Shop” page from the “Pages” section. Now, add new products by click on the “+” icon. Squarespace lets you sell physical products, digital products, services, and subscriptions, among other things.
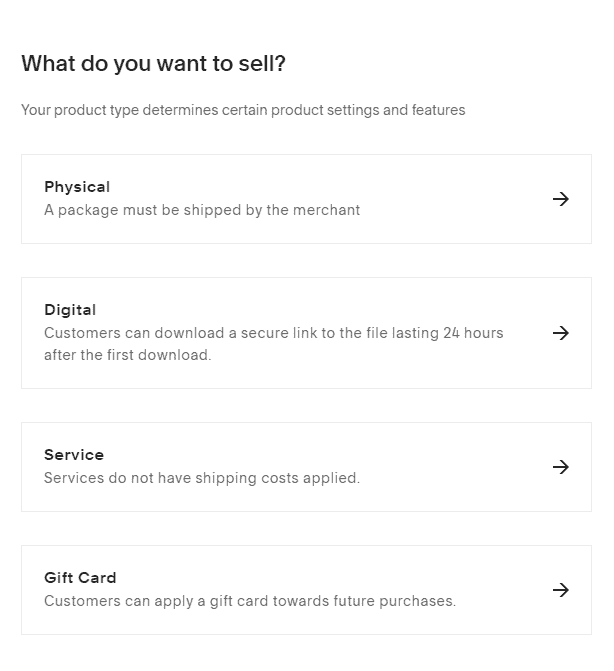
Select the product type you want to sell and add the product’s details in the appropriate section to get started.
Don’t forget to add a photo of the product, along with a short description. Add specifications to help your customers understand the work a little better.
Squarespace also allows you to optimize your product pages for search engines while adding the products. So, don’t miss it!
5. Choose Payment Gateway for your store
One of the main aspects of online stores is that it allows your customers to pay you remotely. But before you start receiving money for the goods you sell, you need to choose a payment channel.
To set up the payment method for your store, go to the “Commerce” section from the sidebar and select the “Payments” option to choose the preferred payment gateway.
Squarespace lets you choose between PayPal, Stripe, and Apple Pay as payment channels. You can select one or more of these options to receive payments. The payment system varies based on geography, so choose the ones that are popular at your location.
Link your existing accounts for these payment channels, create a new account, and link it to the store.
6. Select the Localization and Calculate Taxes
Any person can access your website, but you cannot sell your products, at least the physical ones worldwide. As a result, you need to set the location, currency, and measurement units for the products you sell.
You also need to pay taxes when you sell your products online. It could be hard to calculate the taxes on your own, so Squarespace comes with a built-in tool.
Depending on your location, the tool would calculate the amount you need to pay as tax. The amount could vary depending on the product’s nature, physical or digital, and product type.
To set up the tax calculation system for your store, go to the “Commerce” section and select “Taxes.” Click on the “Set up Now” button.
A popup will appear where you will have to select the country from where your business operates.
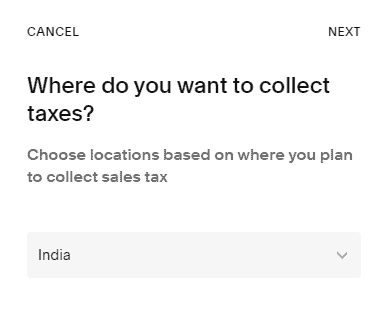
Now, you’ll have to add the tax name, the tax rate in your country, and select whether you want to charge tax on services and shipping or not.
Save it, and the tax calculation system for your store is set up.
7. Choose how to ship your product
If you are selling digital products, you don’t need to worry about shipping and delivery.
However, if you intend to sell physical products, setting up a shipping and delivery system is necessary. Squarespace helps you with this section as well.
To add the shipping cost, go to the “Commerce” section, then select the “Shipping” option.
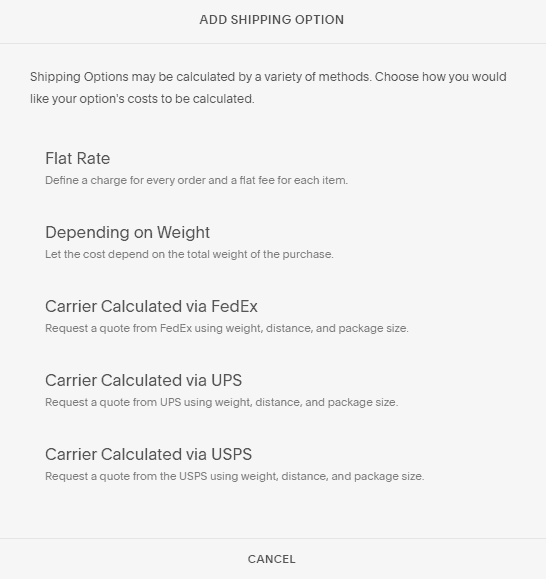
Here, you can choose to charge the shipping cost based on various factors. You can go with a flat rate shipping offer, choose to set shipping based on the product’s weight or let a shipment company do it for you. You could also opt out of shipping costs if you want to.
Squarespace offers you a list of options that vary based on the type of product you are selling and your geographical location. Choose the shipping partner that you want, and you are nearly ready to start your online store.
8. Finalize the Store Layout
You have created an online store, and it is ready for business use. However, it might not look as attractive as you wanted it to be. So, take some time and optimize various pages of your website to look appealing to your customers.
You want to create a good impression and want your customers to return to your website. To ensure this, keep the website layout simple and easy to understand.
Also, make the website easy to navigate and add a contact form to your website. It makes it easier for your customers to contact you if they need to.
8. Update the website settings
Now, your Squarespace website is ready, but before making it live, update your site’s settings. Just go to the “Settings” section in the sidebar and do the needful.
In the settings sections, you’ll see a list of options. Go to each option and change/update preferences according to your region and business model.
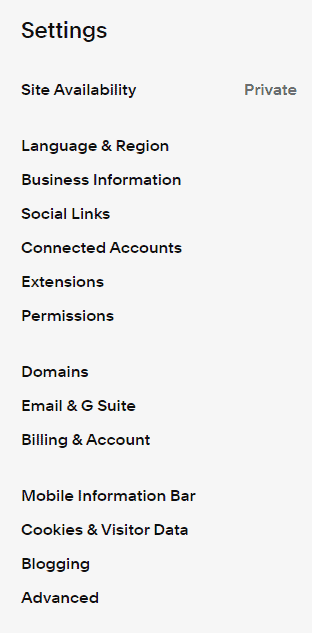
Here, you can add the domain(s) for your site, connect social profiles, add teammates, connect external tools like Google Analytics, Facebook pixels, etc.
10. Launch your store
Your eCommerce website is now ready to be live. However, Squarespace doesn’t allow you to make your website without selecting one of their paid plans.
So, in the settings, select the “Site Availability” option and then click the “Upgrade to publish” button, which will take you to choose one of their plans.
The eCommerce features are provided with the Business plan and higher, which starts at $18/month (if paid annually). The business plan is an excellent choice if you are just getting started, and you can upgrade it as the business grows.
Congratulations! Your online store on Squarespace is now live and ready to take orders.
Ready to Start your Online Store on Squarespace?
Every day millions of people buy products from various online stores. Recently, the US saw an up to 43 percent increase in online shopping in September. Many merchants wish to bring their businesses online but are unable to do so due to various reasons.
Many times, merchants don’t start an online store because they don’t know how to create a website. Building a website from scratch is difficult, but various eCommerce platforms let you set up a website within minutes.
One such platform is Squarespace. It not only lets you create a website but also helps you turn it into an online store. With the help of Squarespace, you can set up your online store within minutes. It takes care of your website so that you can focus on your business.
Now, if you have set up your website on Squarespace, it is time to optimize it for SEO. Follow our complete Squarespace SEO checklist to ensure it is ready to be indexed by search engines.


