Being in the eCommerce industry for over a decade, Shopify has made tremendous improvements to the platform, enabling anyone to sell products online in the easiest way possible.
Shopify has always been the first to adopt the latest technology, keeping its users updated and ahead in the competition. Taking this approach forward, Shopify has recently announced on Twitter that it allows selling non-fungible tokens (NFTs) directly via its storefront.
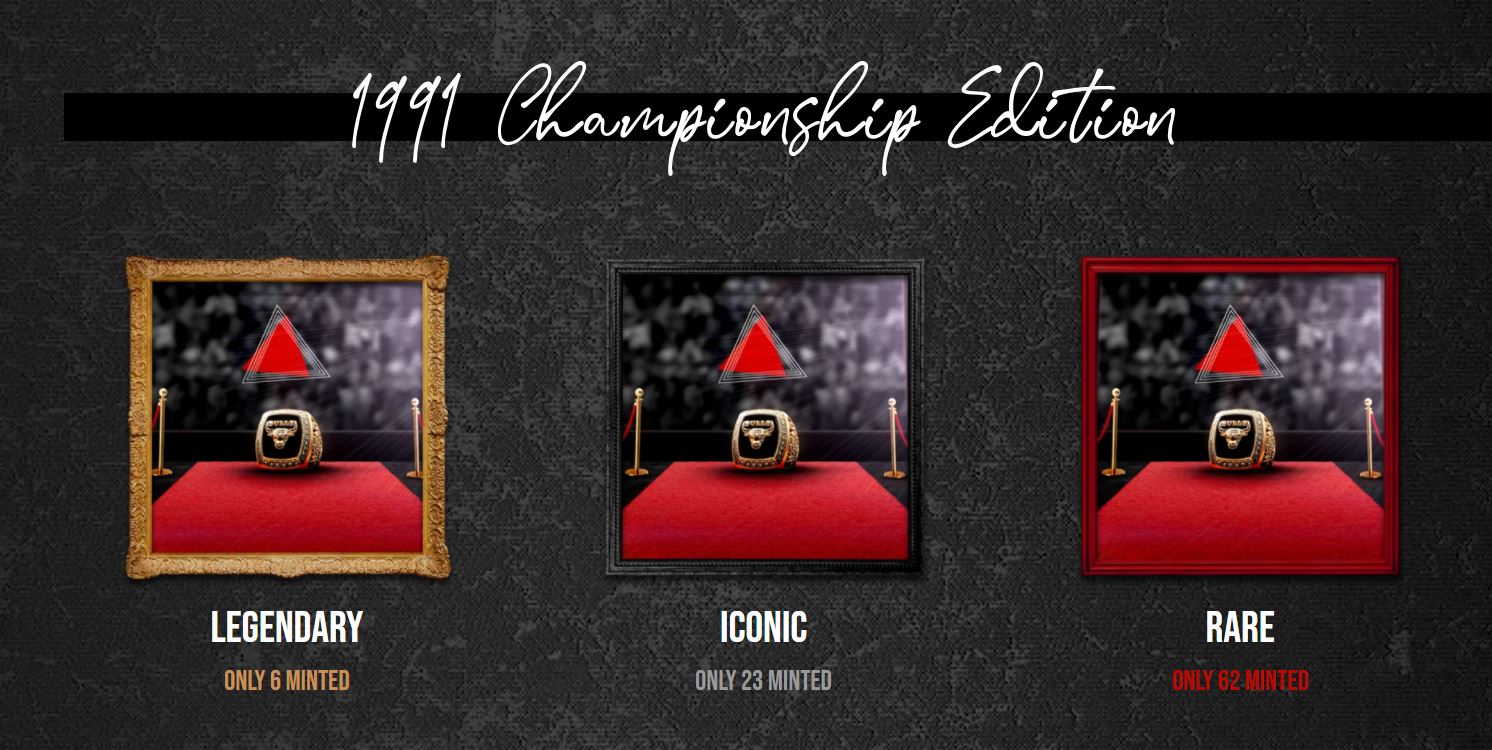
With this announcement, The NBA’s Chicago Bulls became the first to launch their NFT store on Shopify.

NFT is an emerging concept, and Shopify allows merchants and artists to sell NFTs on the platforms is a big deal for NFT artists, investors, and enthusiasts.
There are several NFT marketplaces, such as OpenSea, Rarible, etc., where you can create and sell your NFT art easily. However, if you prefer to create your own website to list your NFTs and sell directly, Shopify can be a platform to consider.
Although Shopify announced that it now supports NFT selling on its platforms, we couldn’t find any guide in their knowledge base regarding this. This makes it kinda difficult for anyone to get started.
That’s why we at EcomSutra, did the leg work to help people like you understand the concept of NFTs and start selling them on Shopify.
That being said, let’s start with the basics. (if you know the basics, feel free to skip to the section that matters to you)
What is a Non-fungible Token (NFT)?
A non-fungible token is a digital asset representing the ownership of unique items like art, music, audio, video, etc. NFTs can be bought and sold online via cryptocurrencies as they use the same blockchain technology to process the transactions.
You can convert any of your digital assets into an NFT, and they will be tokenized. This gives you a digital certificate of ownership so your customers will be proud to buy authentic products from you.
Having gathered so much hype, you might be wondering about the significance of NFTs. Let us now have a look at them –
- All digital files can be duplicated, but it is not possible in the case of NFTs since they are tokenized.
- NFTs create a new revenue stream for artists such that they get ownership and earn in royalty for lifetime.
- The metadata present on the token cannot be deleted or erased, which means it resides permanently.
- The NFT creators have the power to issue only a specific number of tokens to forge scarcity in the supply for boosting demand.
Currently, most NFTs are powered by the Ethereum blockchain. However, other blockchains also support the processing of NFTs. Some of the popular ones are Solana, Tezos, Binance, Tron, Flow, etc.
On the whole, NFTs are one-of-a-kind assets that can be bought and sold like any other piece of property. The only thing is that it does not have a tangible form and can’t be interchanged with something else.
7 Steps to create Shopify NFT Store
Since Shopify has allowed the selling of NFTs, merchants & artists can offer their customers the convenience of buying directly from their online store, which simplifies the purchasing journey.
However, to create a Shopify NFT store, you first need to create NFTs elsewhere and then list them on the Shopify storefront where you can receive payments and deliver the products – just like other digital products that you sell.
So, let’s start creating your Shopify NFT store.
Step 1: Find Digital Items for NFTs
First things first, find and pick the digital items that you think are unique and can be considered as an NFT. It can be anything like art, memes, virtual land, avatars, recipes, etc.
There are currently no restrictions for the kind of content that can be converted into an NFT at the moment. If you don’t have any such unique items, you can always collaborate with digital artists and convert their artworks into NFT.
Step 2: Decide Blockchain for your NFTs
Next, you have to choose a blockchain to mint your NFT. Some of the popular blockchains that support NFTs are as follows –
- Ethereum
- Solana
- Tron
- Tezos
- Flow
- Binance
However, Shopify currently supports Ethereum and Flow blockchains to create and process NFTs. There are chances to add more blockchain in the future but for now, you have to pick one of these two.
While choosing your preferred blockchain for NFTs, you need to keep in mind the gas fees charged by these platforms. Gas fees refer to the network fees that users have to pay while making any transaction on the network.
In the case of NFTs, you have to pay gas fees to mint your NFTs, and the buyers would have to bear the same while purchasing them in addition to the NFT product price.
Also, you should know that gas price increases when the network experiences a high volume of transactions. So, either you can avoid making any such transaction during network congestion or be ready to pay high gas fees for minting your NFTs.
As of now, Ethereum processes NFTs with the highest gas fee in comparison to any blockchain mentioned above. So, if you are just trying your hands and don’t want to spend much, try Flow blockchain first.
Other criteria to consider apart from gas fees are security, scalability, and token development cost on the blockchain. Ethereum excels at all the factors, except high token development cost.
However, since it is the most popular platform for NFTs, so for the sake of this guide, we will be creating NFTs on Ethereum.
Step 3: Set up your Crypto Wallet
Once you have decided on your blockchain preference, you have to set up a Crypto wallet compatible with the selected blockchain. Crypto wallets are like other digital wallets that allow you to store your crypto assets including NFTs.
Some of the popular crypto wallets with multi-chain support are as follows –
- MetaMask – Most popular Crypto Wallet
- Trustwallet – Best Mobile Crypto Wallet
- Ledger Wallet – Best Hardware Crypto Wallet
So depending upon your expertise, usage flexibility, and requirements, you can choose any of the above wallets for your NFTs.
Next, you’ll have to add Ethereum ($ETH) to your wallet. It will be used to pay for gas fees while minting NFTs. So, ensure that you have enough ETH in the wallet.
Step 4: Connect to a NFT Marketplace
Once you create a digital wallet and add ETH, go to one of the NFT marketplaces and sign up using your wallet.
As of now, we just know that Shopify has integrated with Sweet NFT marketplace through which the Chicago Bulls NFTs were sold. Hopefully, they will support other NFT marketplaces and allow you to choose with any of the NFT marketplaces.
Meanwhile, you can follow us on Twitter to stay updated with any progress in this aspect.
Upon signing up, upload your item to convert it as NFT. Give it a proper name, click on the create button, and yeah, your NFT is ready to be sold.
Step 5: Set up your Shopify Store
By now, you should have minted your NFTs. Next comes building your Shopify storefront to display your NFTs and allow customers to purchase.
The process is super easy, just start with creating your Shopify account and you’ll see your CMS dashboard to build and manage your entire store. You can start by selecting a suitable Shopify theme for your store that allows you to add a touch to your NFTs.
Next, add your NFT products details – images, video, or audio with description, price, and other essential information.
If you are a beginner, you can head over to our Shopify tutorial to learn how to build and get your Shopify store live within minutes.
Step 6: Enable Payment & Checkout Process
Now comes the important step – how will you process the payments for your NFTs?
Well, as of now, Shopify Payments doesn’t support crypto payments. But there are several third-party payment gateways such as Coinbase and Coingate that you can use to receive payments for your NFTs.
While choosing the payment processor, ensure that it supports the blockchain on which NFTs are minted and provides excellent customer support to help you with configuration and other technicalities, if needed.
Step 7: Launch Your Shopify NFT Store
Once you have created essential pages such as about, FAQ, contact pages and payment method is also working properly, you should be ready to launch your Shopify NFT store.
However, if you are on a free trial, you will have to pick a pricing plan and add a domain name before making it live.
Godaddy, and Namecheap are the best domain registrars that you can use to purchase your domain at a reasonable and discounted price.
Ready to Sell NFTs on Your Shopify Store?
As mentioned earlier, Shopify has enabled the selling of NFTs but there is still not much clarity about the same on their resource pages. Everything that we have discussed till now is collated from credible News publications and experts in the crypto/NFT sphere.
Rest assured, we will keep our eye on any update from Shopify regarding the same and keep you updated.
On that note, here are a few points that you should keep in mind while creating your NFT store on Shopify –
- Shopify currently supports Ethereum and Flow blockchains to create and process NFTs.
- Shopify supports integration with Sweet NFT marketplace which you can also use to mint your NFTs and then list them on your Shopify store.
- Shopify doesn’t hold any responsibility for the storage and delivery of NFT assets to your customers. It will not provide any direct resource to create or host NFT themselves.
- Merchants i.e., YOU must take ownership of all the processes involved in purchasing and delivering of NFTs to the customers.
I hope this guide gave you an overview of how you can sell NFTs on Shopify storefront. If so, do share with your fellow NFT artists and entrepreneurs to leverage this opportunity of blockchain revolution.


