Is your Squarespace site ready to go live? Want to make sure that the site is ready to rank before going live?
Then this checklist is for you.
In our Squarespace tutorial, we have shared a step-by-step guide to building an online store on Squarespace. Now, if you have already created your site, with this SEO checklist, you can ensure it is search engine friendly before you make it live for consumers.
But before diving right into the checklist, let me answer the most common question I have been asked about Squarespace.
Is Squarespace good for SEO?
Squarespace is well-equipped for SEO as it offers the built-in features and tools to optimize your site for search engines.
If you are new to Squarespace SEO, it probably takes some time to get used to their editing interface. But once you get comfortable with it, everything becomes simple, and you can constantly work on optimizing your site for SEO.
Unlike popular website building platforms like WordPress, Shopify & Wix, Squarespace doesn’t provide any SEO extension or allow third-party tools to automate your SEO tasks like image compression and optimization – you have to add alt text and reduce image size manually before uploading them to your site.
Pre-launch SEO Checklist for Squarespace Ecommerce Site
Squarespace comes with plenty of SEO features to ensure that the websites built on the platform are search-engine friendly.
In this section, I will walk you through every SEO feature and share some best practices to optimize your Squarespace website for SEO.
If you are ready, let’s get started.
1. Turn on SSL
In order to make the web a safe destination for users to browse, search engines like Google & Bing give higher preference to websites with HTTPS protocol over others in ranking.
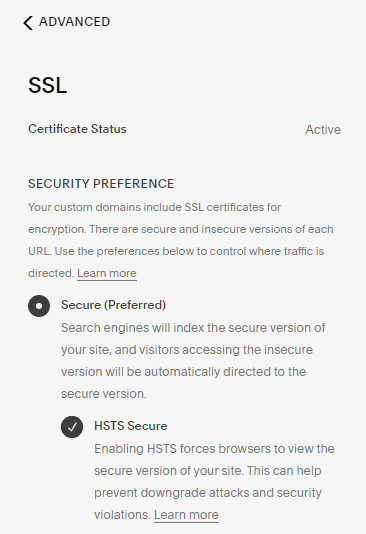
Squarespace provides free SSL certificates to websites once you add a custom domain. To check whether SSL is turned on for your site, you can follow this –
- Go to Settings → Advanced → SSL.
- Choose Secure and HSTS options which ensures that your site is protected and secure.
- You can see the certificate status as active, as shown in the image below.
2. Connect a custom domain name
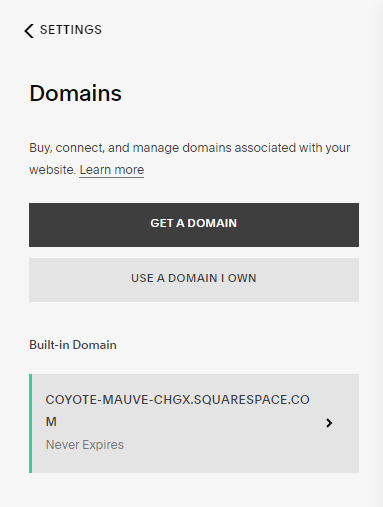
A domain name is the web address that your customers use to find you online. Squarespace provides a temporary domain name while using its free trial, but you have to add your custom domain to get your site live.
To connect your domain, go to Settings → Domains, select whether you want to buy a domain name from Squarespace or use a custom domain that you already own.
If you don’t own a domain name yet, instead of buying a domain from Squarespace, I’d recommend you to buy a domain name from a recognized domain name provider such as Namecheap, GoDaddy, or others that gives you more freedom with domain management and transfer, if needed.
Read – Best Domain Registrar Websites to buy domain names
3. Add locations
Location management is one of the most critical factors for local SEO optimization.
If your business has a physical location, with Squarespace, you can do this at ease by following two methodologies –
- Embed Google maps
- Or create a contact us page with your locations.
Squarespace also allows you to connect your existing Google My Business profile and manage all critical business details like service hours, addresses, etc., right from the dashboard to keep the information up to date.
4. Add related products on product pages
Adding related products on product pages is one of the effective internal linking strategies for eCommerce sites. This helps search engine bots understand relations between the products and thus strengthens the internal link structure for the site.
Here’s how you can add the “Related products” section on the product pages –
- Go to your product editor and navigate to the related products section.
- Enable the “Show Related Products” toggle.
- Add the title for the related products section.
- Choose any of the display options (Random, Recently added, and highest quantity).
- Click Save.
5. Customize URL slug for each page
URL slugs act as a keyword reference for the search engine bots to understand the pages and index them accordingly. So, you don’t want the page to be random numbers that say nothing about the page and make it difficult to remember for users.
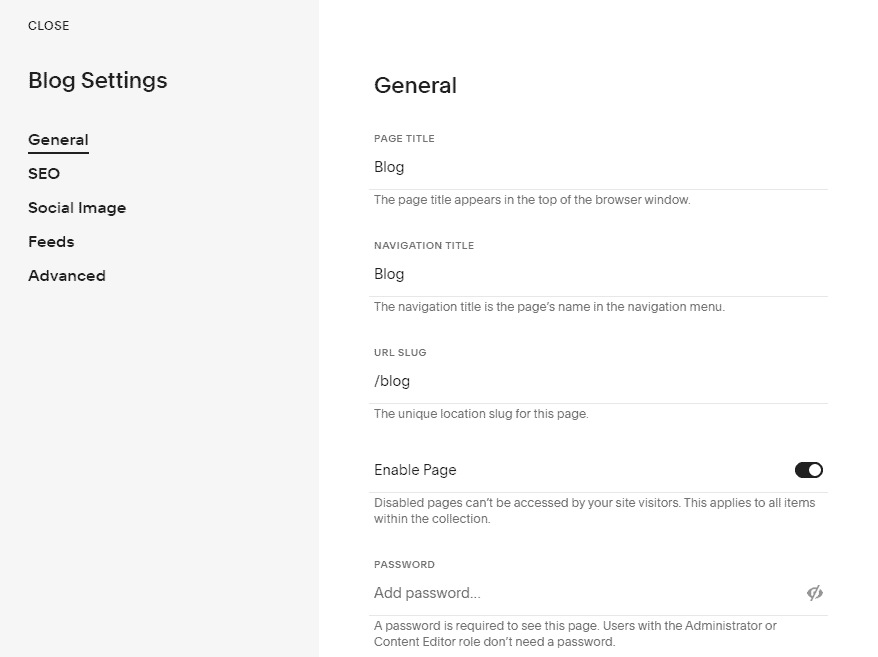
Squarespace understands this and allows you to customize URL slugs for each of your site pages. Here’s how you can customize the URL slugs –
- Head over to Pages → Hover over a page → Click on the settings icon.
- In the page settings, select the General tab.
- You’ll see an option called “URL slug,” in which you can edit the URL slugs for your site pages.
- Ensure that the changes have been saved.
6. Reduce page size for faster loading
The loading speed of a page depends on several factors, among which the image size and number of images on a page play a key role in increasing the page size and thus the loading time.
Squarespace recommends you to maintain every page on your site to 5MB or rather less than that. Also, you can use tools like GTMetrix, Uptrends, and Pingdom to check your page loading speed.
So before your site goes live, ensure that the page size is minimized so that it doesn’t affect the loading speed.
Squarespace doesn’t have any built-in image resizing tools, so you will have to compress the photos before adding them to the site.
You can use reliable third-party tools, like TinyPNG or ImageOptim to reduce the image size significantly.
7. Connect Google Search console
Search Console is a powerful tool that allows you to submit site pages and sitemaps for faster crawling and indexing.
It also allows us to communicate with Google regarding –
- Website errors
- Core Web vitals
- Indexing issues
- Manual penalties and more.
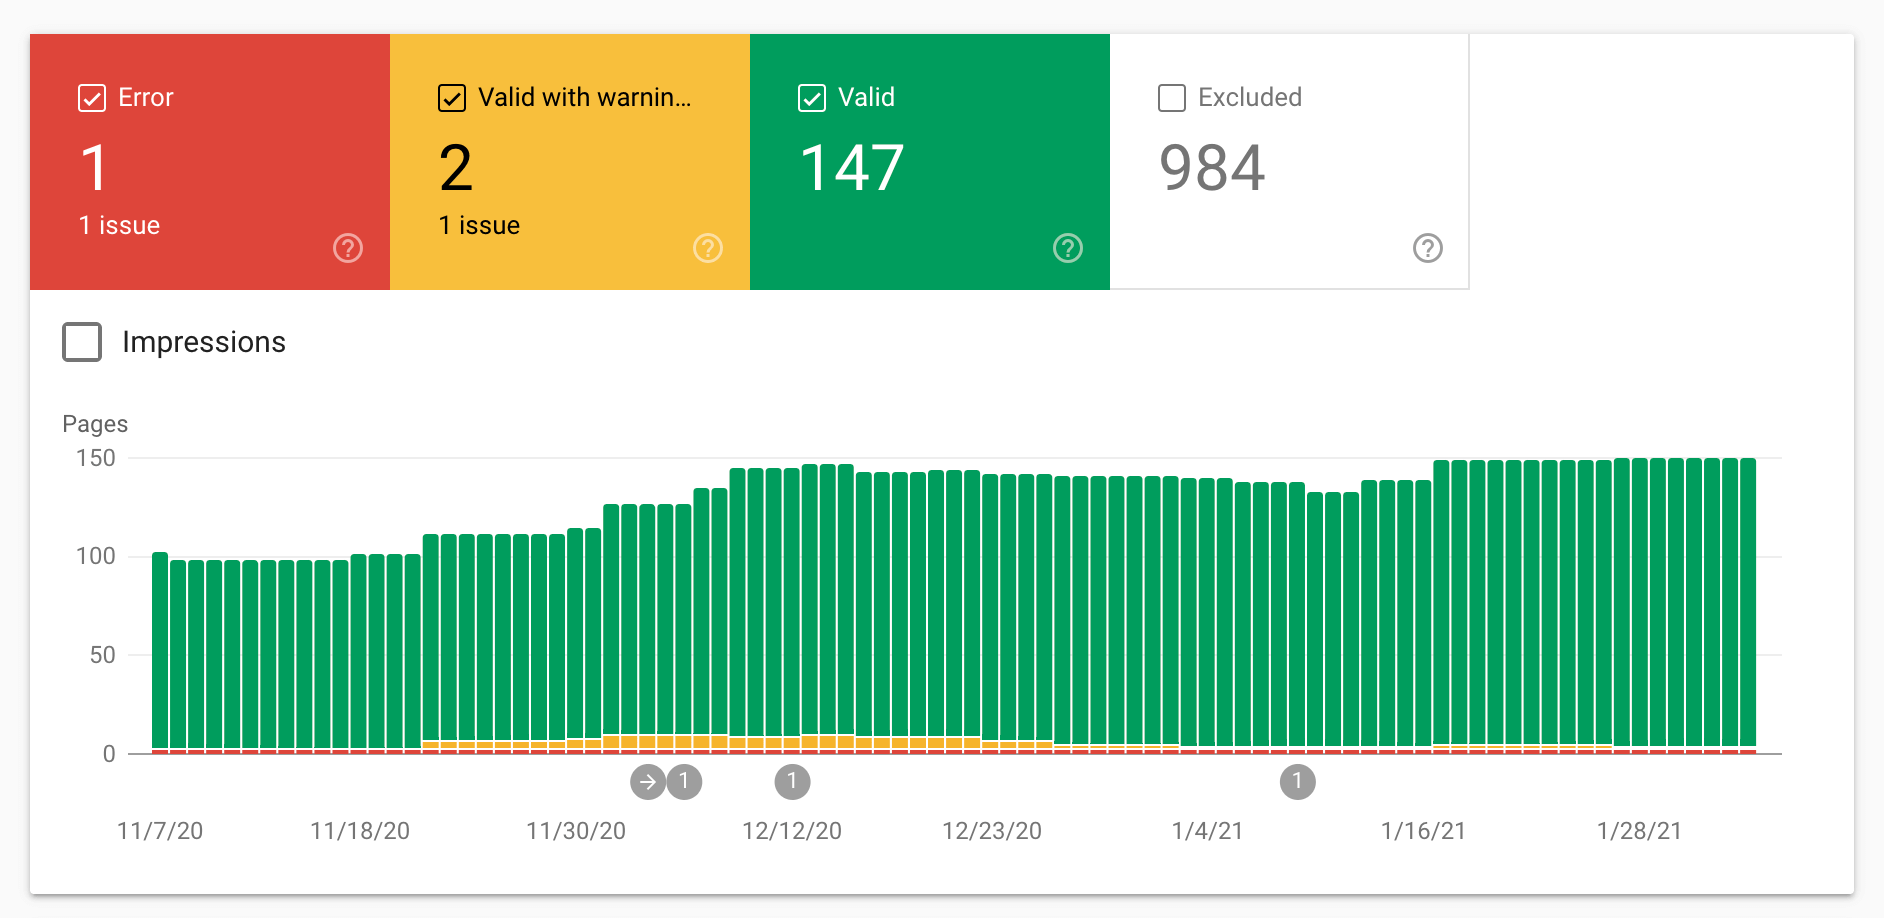
You can connect your Squarespace site with Google Search Console by following these steps –
- Log in to your Squarespace account and navigate to home.
- In the home menu, choose Analytics.
- Once you enter into the analytics page, click Search keywords.
- Click on the Connect option and subsequently follow the steps to verify your site with the Google search console.
8. Submit sitemaps to search engines
A Sitemap tells the search engines where to find content on your website and crawl it for indexing. Sitemaps get updated instantly as soon as a new page, product or post is added on the site and thus indicate search engines like Google to crawl the site to index new pages.
Squarespace generates the sitemap automatically and doesn’t allow you to edit it manually. You can view the sitemap of your Squarespace site by using a URL like yourdomainname.com/sitemap.xml.
Once you have connected your site with the search console (as mentioned above), you can submit it to Google from the “Sitemap” section of the console.
9. Connect Google Analytics
Google Analytics is a free website analytics tool offered by Google. It is not essentially an SEO tool, but you can track your website performance and optimize it for better results.
Squarespace has built-in integration with Google Analytics, so there is no need to add a script code separately.
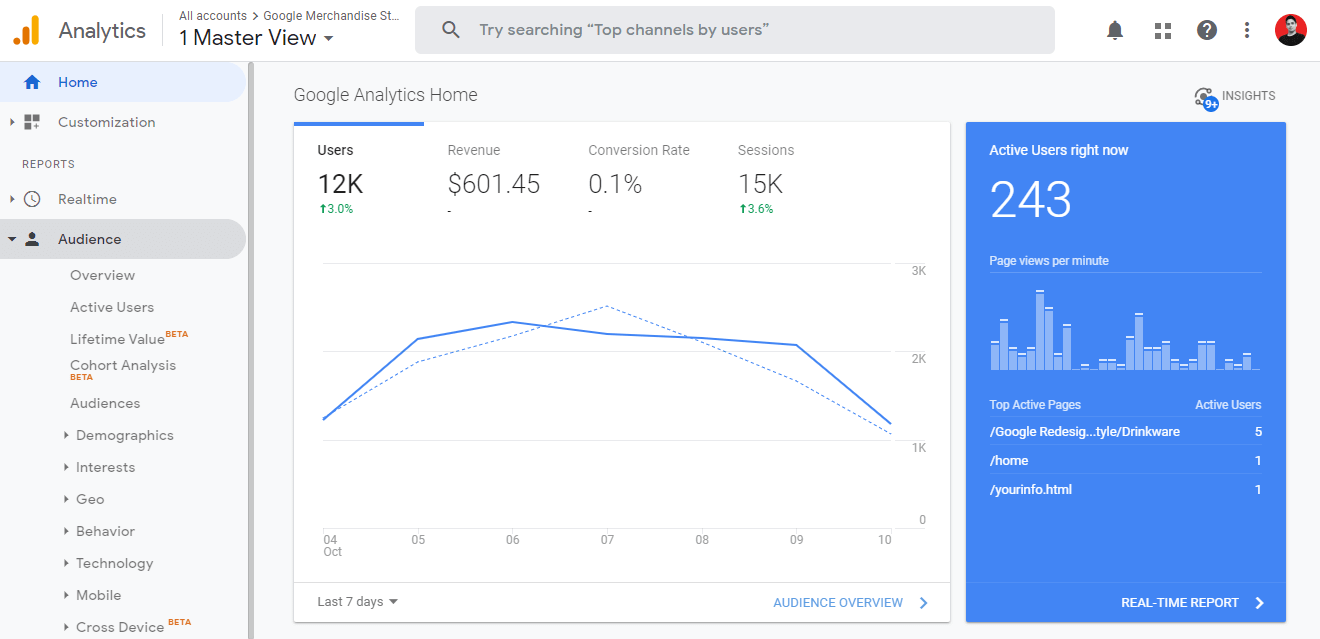
Make sure that you follow these steps to connect your Squarespace site with Google Analytics:
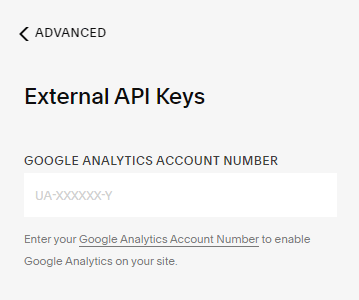
- Go to Settings → Advanced and click External API Keys.
- In the Google Analytics Account Number field, enter your tracking ID
- Check whether the tracking ID is correct and click save.
10. Create custom 404 pages
The primary role of 404 pages is to display an error message stating that the desired page was unavailable. However, if visitors return to the result pages instantly, it results in high bounce rates.
With custom 404 pages, you can add links to the important pages on your site that users might be interested in exploring, thus reducing the bounce rate.
11. Redirect broken links
If you change the URL slug on a page, you should redirect the older URL to the new page to ensure that the page’s link juice is forwarded to the new page and doesn’t impact the page ranking.
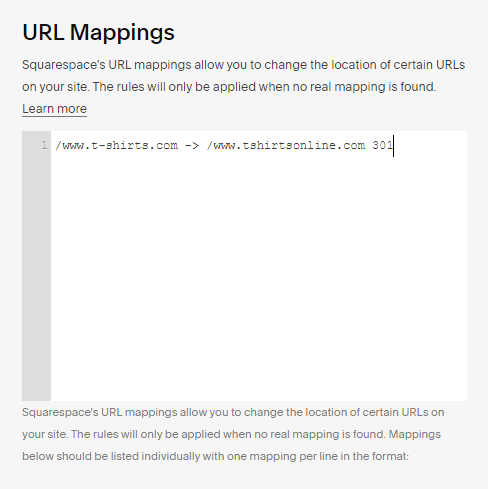
With Squarespace, you can quickly get rid of this by redirecting broken links by following these steps-
- Go to Home → Settings → Advanced → URL Mappings.
- In the URL mappings, click the text area and add your redirects.
- The format is <old url> → <new url> <redirect type>
- You can either specify a 301 or a 302 redirect depending upon the type of redirection.
12. Optimize SEO Title & Description
SEO titles and descriptions are snippets of text that appear on search result pages. These are crucial to creating unique and compelling product and page titles for search engines and users to boost click-through-rate.
To craft SEO-friendly titles and descriptions, you must do your keyword research for the respective products, pages, and articles. And then, try to fit them organically in it so that Google understands what the page is about and ranks it accordingly.
In your Squarespace site, you can edit the SEO title and descriptions in the SEO tab while editing your pages or posts.
Read – How to conduct keyword research for eCommerce sites
13. Add alt texts to images
Alt texts are essential for image SEO. Search engine bots use the alt text to know what the image is about and rank it accordingly on image search results.
Since Google Image search results are one of the most significant traffic sources for eCommerce sites, you should ensure that alt text is added to all the images added on the site.
Squarespace gives you the complete flexibility to add alt texts to product images, video block thumbnails, gallery pages, etc.
In Squarespace, adding alt texts depends on the type of layout you use. For instance, if you are using an inline layout, the captions written in the inline layout will be considered as the alt text for that specific image.
If you are using other types of layout like poster, card, overlap, etc., you need to separately add the alt text to the filename field in the content tab of the image editor.
14. Add a blog
Blogging is a powerful medium for websites to generate more organic traffic to the site. With a blog, you can publish long-form, SEO-friendly articles which tend to rank higher and thus improve the site ranking for the overall site.
Here are the steps to add a blog section to your site using Squarespace:
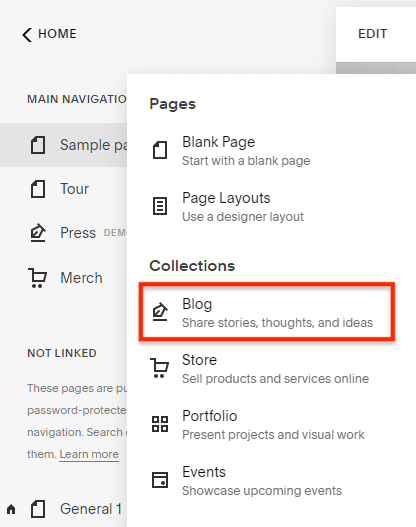
- Go to Home → Pages → Click the ‘+’ icon.
- Under the Collections menu, click Blogs.
- Choose your blog layout and start customizing it.
Read – Best blog topic ideas for eCommerce sites
15. Enable AMP for blog posts
One of the core web vitals for Google ranking is the page loading speed. The page should load within 4 seconds to get ranking preference by Google and other search engines.
To help you with this, Squarespace allows you to create AMP versions, lightweight versions of your blog posts which enables pages to load swiftly on mobile devices.
Here’s how you can enable AMP for your site –
- Go to Settings → Blogging.
- Select the “Use AMP” option to display blog posts optimized for mobile devices.
Wrapping Up
Squarespace is one of the best eCommerce platforms to build an online store to sell anything. It makes it easier for anyone (especially non-tech savvy) to set up a store and build a successful business.
However, to run an online store successfully, it is important that you pay special attention to the SEO aspect of the site. With this checklist, you can ensure that your Squarespace website is SEO-friendly and ready to make a strong presence on search results.
Since you are using Squarespace for eCommerce business, you may also want to go through our eCommerce SEO checklist to ensure better optimization for higher searcg engine ranking.
