Every business owner wants to increase their outreach and attract more customers. Many businesses create their online store to achieve this goal. If you are one such business owner looking forward to starting an online store and need a guide to help you create an online store, you are at the right place.
This guide will teach you how to create an online store on WordPress using the WooCommerce plugin in the easiest way possible. Using these two tools, you can create your website and start selling products in services in no time at all.
If you are unaware of WordPress and WooCommerce, this next section will help you understand these two tools in a better way. On the other hand, if you know what these two tools do, please skip to the next section.
WordPress and WooCommerce: What Are They?
WordPress is a free, open-source content management system. WordPress was made to help people create blogs, but it became one of the most popular tools for developing various websites over time.
At present, over 60 million websites run on WordPress.
In simple terms, WordPress is a tool that enables you to create web pages without any prior knowledge of web development. It helps you create and publish web pages without involving any programming.
Once people got the knack for creating websites using WordPress, they thought about using it to create online stores. This idea led to the development of WooCommerce, an open-source eCommerce plugin for WordPress.
It is one of the most popular tools for creating online merchant stores. It is versatile, and you can use it to create an e-commerce website regardless of how small or big your store is.
With the help of the WooCommerce plugin, you can use a WordPress site to sell digital and physical products, offer services, offer booking facilities, provide subscription-based services, and other things.
What can you sell with WooCommerce?
You might be wondering what you can sell with an online store built with WooCommerce.
Well, the answer is – you can sell anything with WooCommerce.
Here are a few things to list –
- Physical products
- Services
- Print-on-demand products
- Events and Webinars
- Softwares
- Graphics, Images, Videos
- Books and eBooks
- Licensed products, and more.
Whether you have digital or physical products, you can sell them quickly. You just need a WordPress site where you have to install the WooCommerce Plugin and set it up, as I will show you in the next section.
Step-by-Step Tutorial to Create WooCommerce Store
This section will show you the simplest way to build an eCommerce store with WooCommerce.
Ready? Let’s get started with the most essential element of the process.
Step 1: Get a Domain and Web Hosting
Before you start your e-commerce website using WordPress and WooCommerce, you need to do a few things.
- The first step involves getting a domain name. A domain name is in the format of ABC.com (where ABC is the name of your store). You can easily buy a domain of your choice from domain registrars.
- The second step is subscribing to a web hosting platform. A web hosting platform is a remote server that keeps all your website data and allows various users to access your website.
These are the only two things you need to pay to get your WooCommerce store live. And we usually get both from Bluehost. It offers a free domain and affordable hosting plans with optimal security measures and active customer support.
However, if you want to buy the domain and the hosting from other platforms, here are our top recommendations –
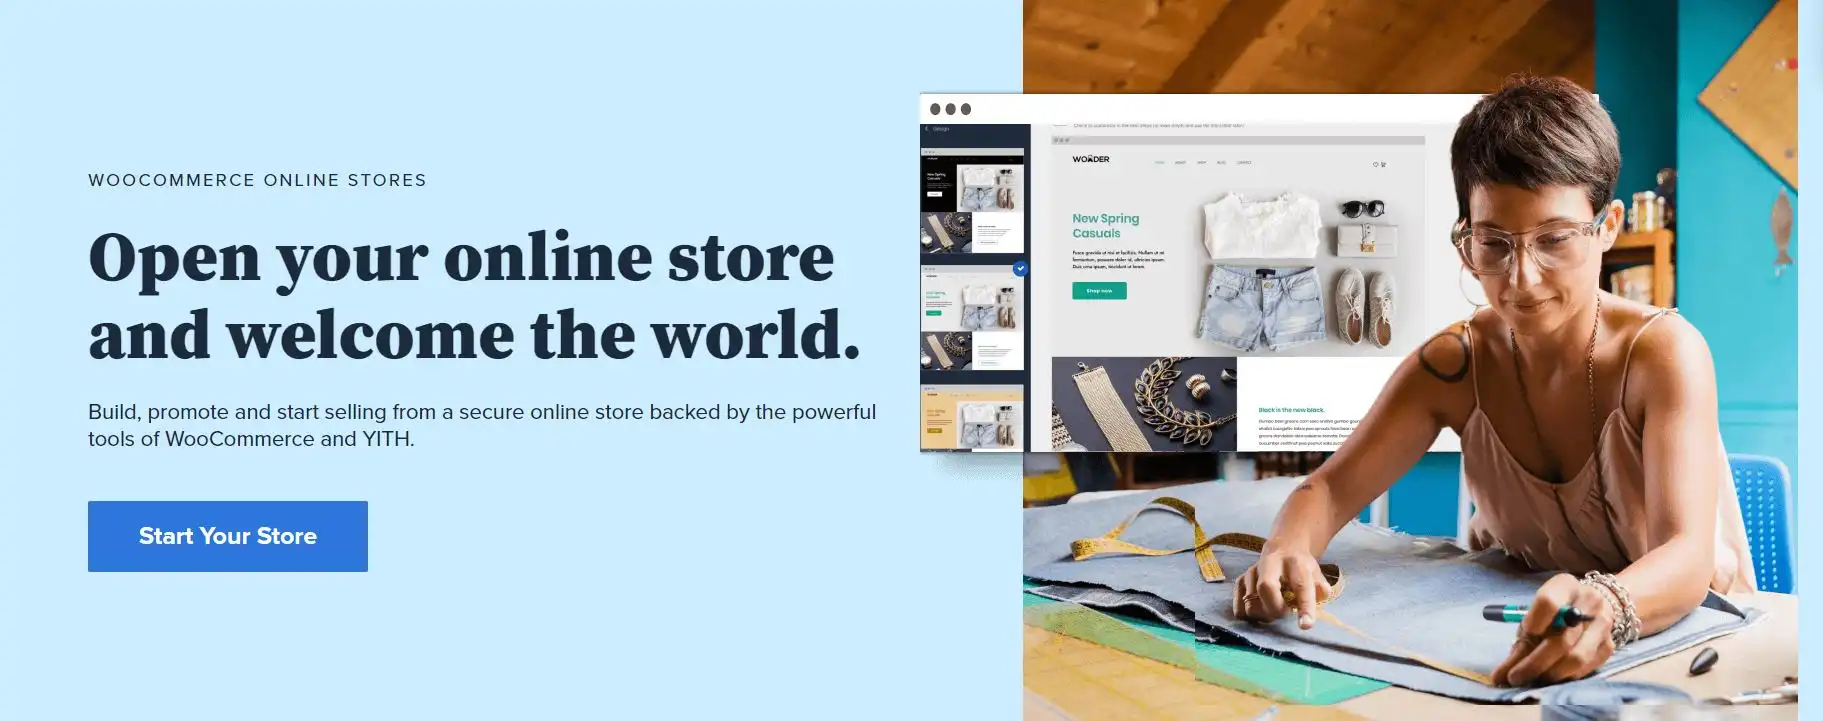
To get started with Bluehost, go to bluehost.com and click the “Start Your Store” button.
Next, choose a plan that fits your budget. If you are a beginner, select the Basic Plan, and you will be taken to set up the domain for your WooCommerce store.
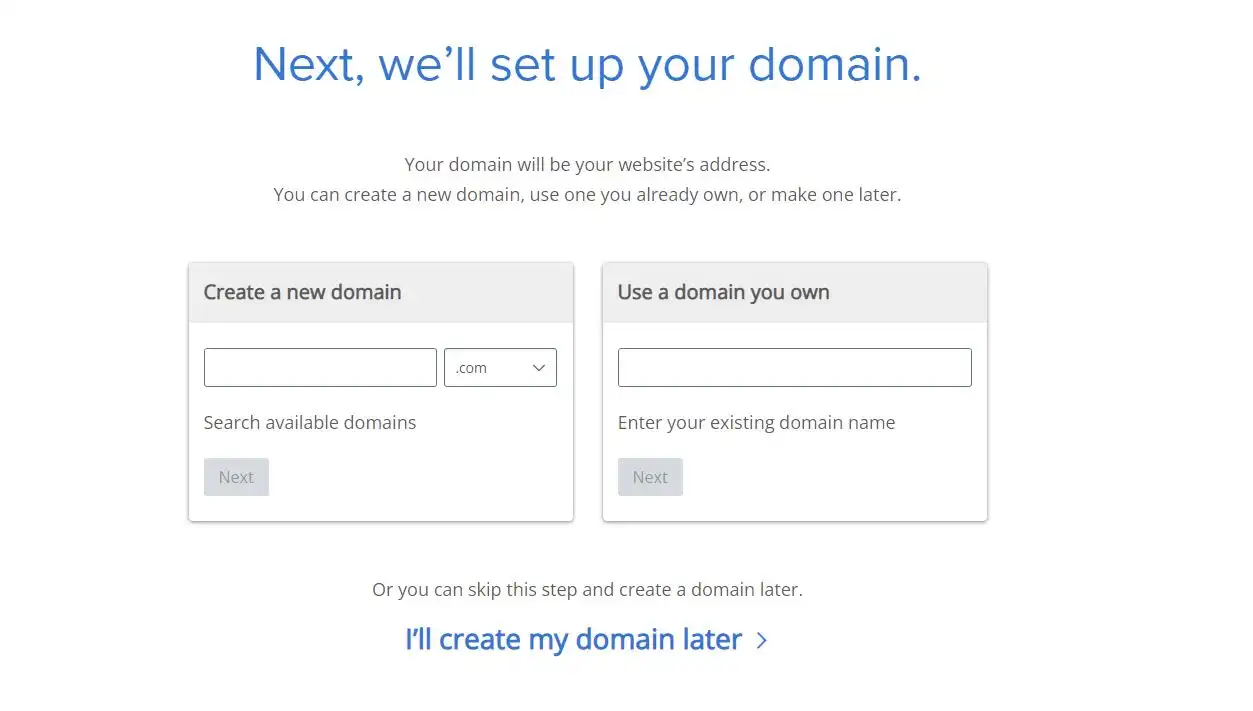
Here, you can create a new domain, which you will get for FREE. If you already own a domain name for your store, you can enter the domain name and click the “Next” button.
Finally, enter your details and complete the payment to set up your hosting account.
Note: On the checkout page, you will see extra options like email and spam protection. If you want those features on your website, go for them, but you can also add them later. At this stage, we recommend unchecking all of them and proceeding with the payment for the selected hosting plan only.
Step 2: Install WordPress
Once you have chosen a domain name and set up your hosting account, it is time to install WordPress on your hosting account. All the web hosting services mentioned above are WordPress-friendly and offer a dashboard that allows you to install WordPress with a single click.
You will get different on-screen instructions depending on your web hosting platform. Follow them, and you will get WordPress up and running in minutes.

Once you have installed WordPress, you can visit your website. At this point, it would be like a blank canvas.
If you add “wp-admin” at the end of your website URL, you can access the admin panel of your website. It allows you to make changes to your website.
Step 3: Install WooCommerce Plugin
After you have installed WordPress and got your website up and running, it is time to add the WooCommerce plugin. WooCommerce is a free plugin you can add to your website through the plugin section of the WordPress Dashboard.
Type “WooCommerce” in the search bar on the plugin page, and you will get the plugin.
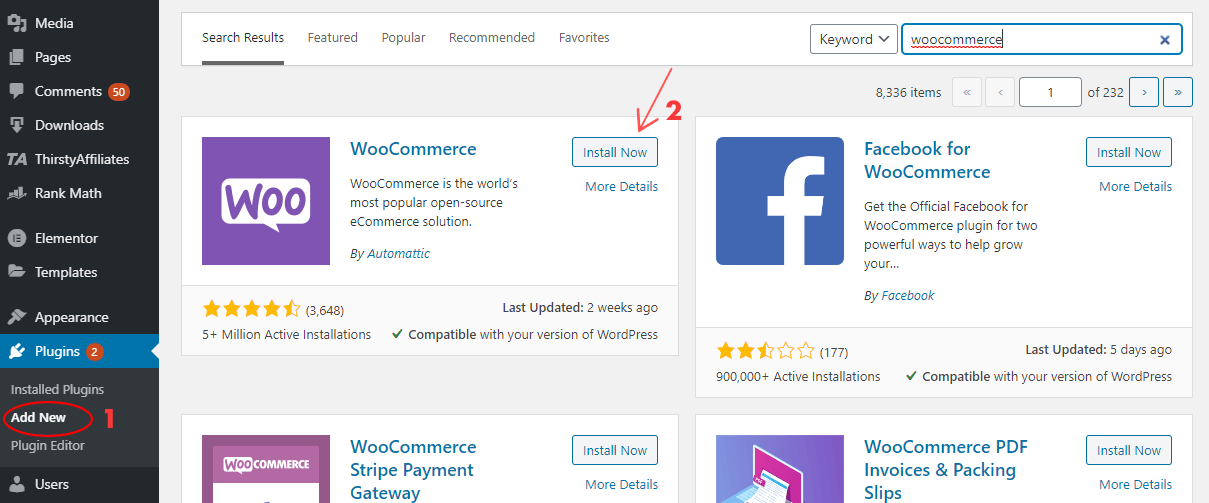
Click the “Install Now” button and activate the plugin to proceed.
After the plugin is activated, an on-screen setup wizard will appear like this –
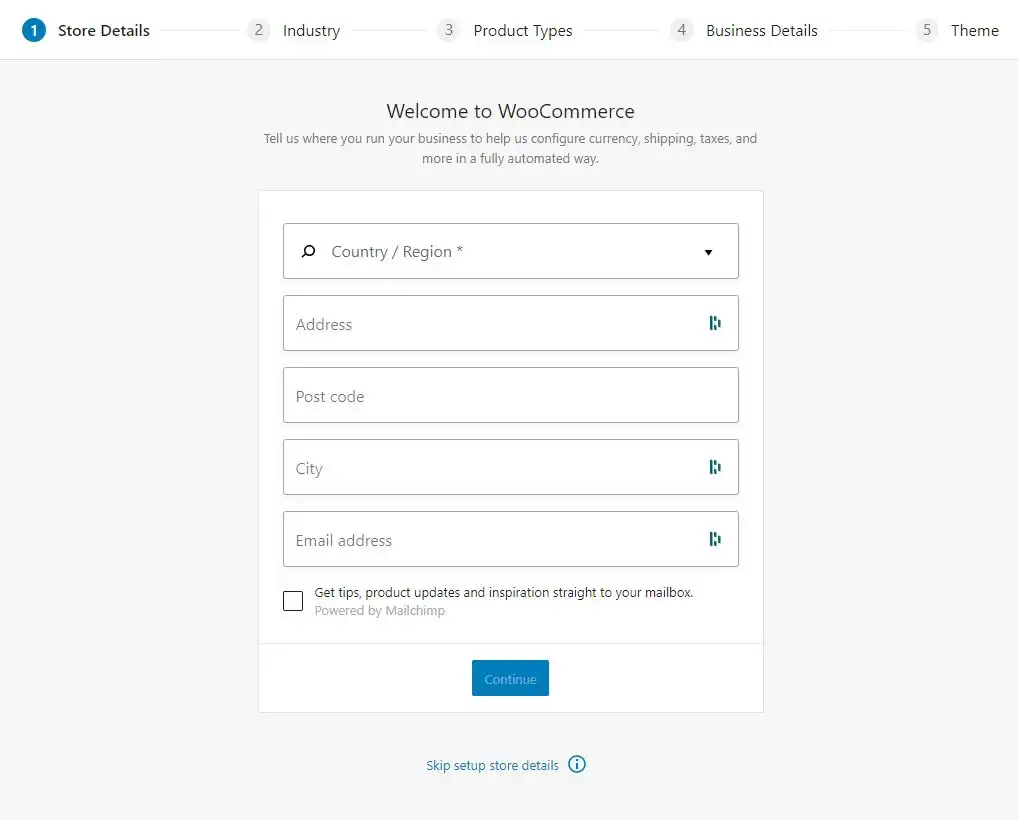
Now, you can go through each step to provide the details, which include store details, industry, product type, and business details.
In the end, you’ll then be asked to choose a theme for your WooCommerce store. If your existing theme is compatible with WooCommerce, you can click “Start with the existing theme.” But if you’re starting from scratch, select one of the free themes and click “continue” to complete it.
After completing this setup wizard, you will be directed to the WooCommerce Home on your WordPress dashboard. There, you will see a setup checklist that you can follow to complete the WooCommerce store.
Or, you can skip it and keep reading this tutorial to learn the best practices to complete the setup process.
Step 4: Add Your Products
Now, you have a bare-bone website ready to list your products.
To add the products, go to Product → Add Product from the left sidebar on your WordPress dashboard. Then, you will see a screen like this to add product details.
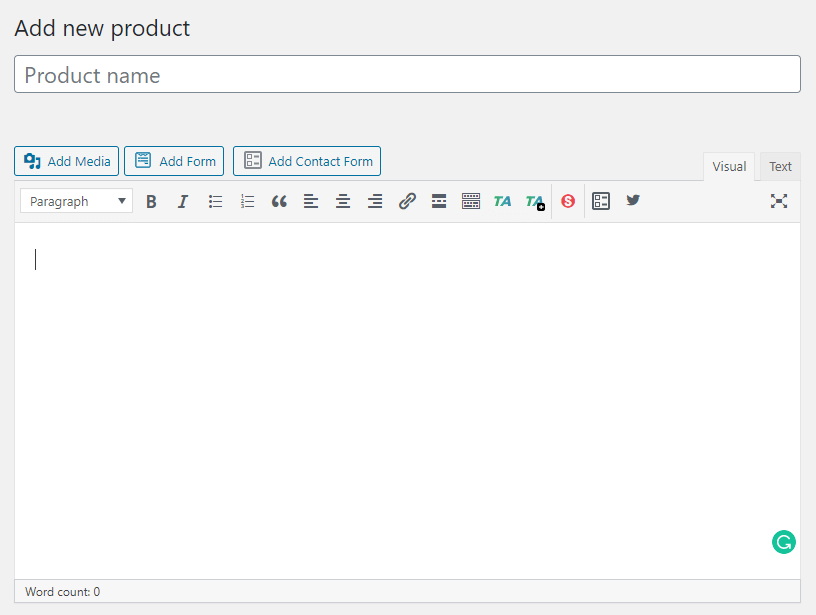
Here, you will have to fill up all the details related to your product. Here are the essential fields that you must not ignore –
- Product name.
- Product description. This is the main product description section, where you can talk about your product in detail and include images and videos to support it.
- Product data. This section is where you select the type of product you’re adding and whether it’s a physical, a downloadable, or a virtual product (services are considered virtual products too). You can also add several other product parameters that allow customers to filter the products and learn more about the specific products. These are as follows –
- General. Add regular and sales prices.
- Inventory. Add the stock level and select whether you want to limit the number of quantities per order.
- Shipping. Set the weight, dimensions, and shipping class.
- Linked Products. Add related products shown in the “You may also like it” section.
- Attributes. Set custom product attributes like color variation, size, etc.
- Advanced. If you are selling something that should have a note related to how to open or use it, add the purchase note else, leave it.
- Short Description. This product description is visible on archive or catalog pages below the product image. Add a short and intriguing description here.
- Product Categories. Assign a category for your product.
- Product Tags. This is similar to WordPress tags; it helps you organize products with different tags.
- Product Image. This is the main product image that is visible on the catalog pages. Add the best picture of your product here.
- Product Gallery. These images are visible on the product page only and allow you to showcase your product in different angles or use cases.
After filling up all the details, click the “Publish” button to add products to your online store.
Similarly, populate the store with all the products that you want to show in your store. Regularly visit this section to make adjustments to your catalog.
Step 5: Add Payment methods
Online payment is the core of an eCommerce website. So, you want to provide multiple payment options at checkout for higher conversion rates.
Fortunately, WooCommerce understands this and takes care of this part by offering you to set up multiple payment options, which include PayPal, Stripe, WooCommerce Payments, Cash on Delivery, etc.
To add your payment methods, go to WooCommerce → Settings → Payments.
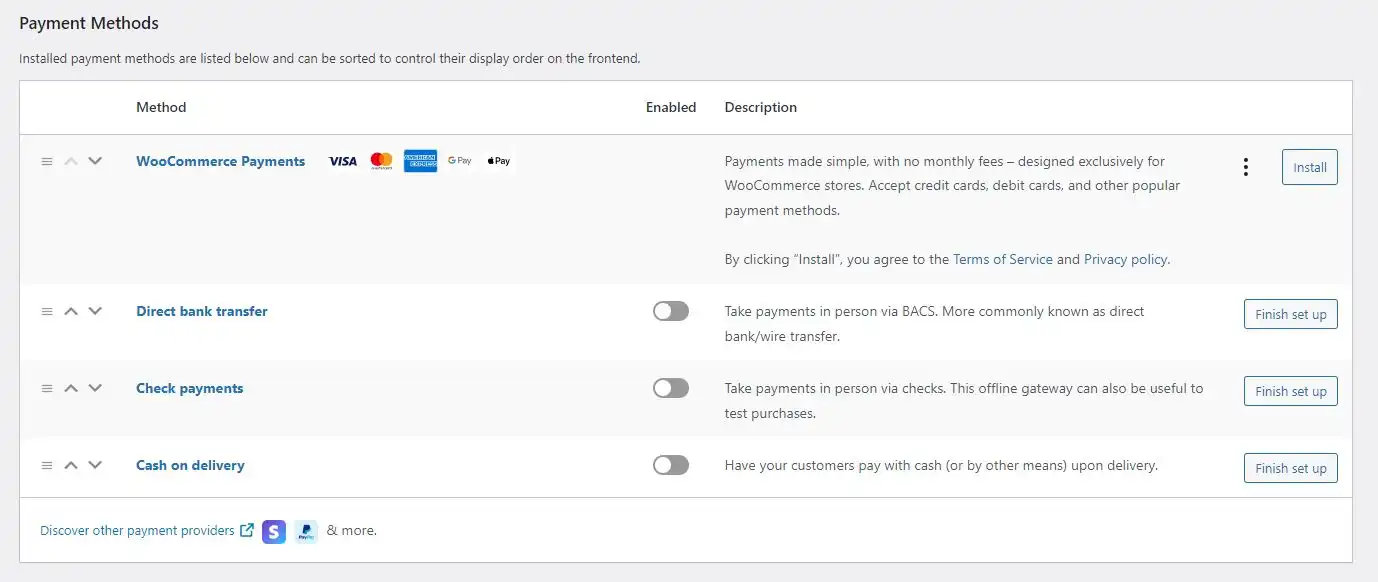
WooCommerce Payments is an in-house payment gateway that provides multiple payment options, including Apple pay and Google pay wallets. However, it is available only in selected countries, which include the USA, UK, Canada, Australia, etc.
So, for most customers worldwide, PayPal & Stripe are the go-to options, as they are available in most countries and offer multiple payment options, including online payment through credit cards, offline payments through checks, bank transfers, and cash on delivery.
To set up PayPal and/or Stripe, you must create an account on these platforms beforehand and provide the required credentials.
Apart from PayPal, WooCommerce supports local payment gateway providers as well. So, check the WooCommerce extension store to see if your preferred payment gateway is available.
Step 6: Setup Sales Tax Calculation
Sales tax is an integral part of any business. So, if you plan to charge taxes on your products and shipping services, you might also want to set up the tax rates and calculations.
With WooCommerce, you don’t need to worry about that, as it provides a built-in system to automate tax calculations and display rates to your customers.
To get started, go to WooCommerce → Settings → General. Then tick the “Enable tax rates and calculations” box and save the changes.
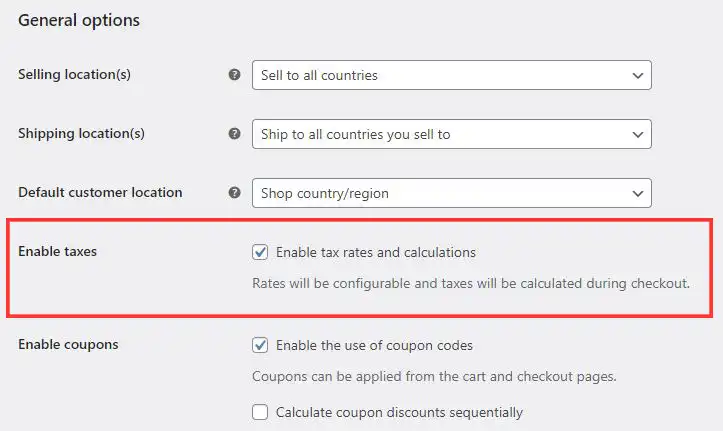
Now, you will see a “Tax” tab on top where you need to configure the taxes. Click on it, and you will see various options to fill up per the tax laws in your region and business requirements.
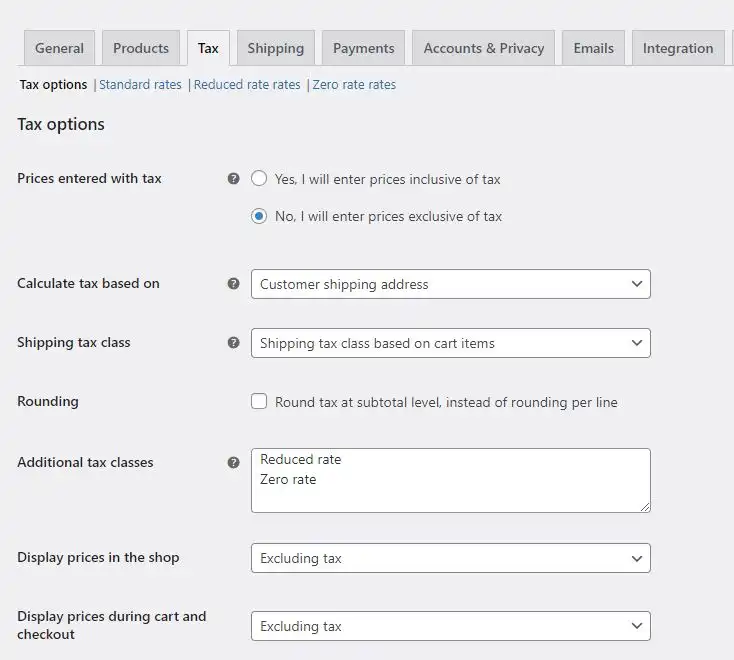
WooCommerce pre-fill the taxation rules based on your store location. Still, it is advised to cross-check the data based on the taxation rules in your country and update it if needed.
Step 7: Set up Shipping Methods
If you plan to sell physical products that need to be shipped to customers, you need to configure the shipping options. To get started, go to WooCommerce → Settings → General. Then choose where you will be shipping your products.
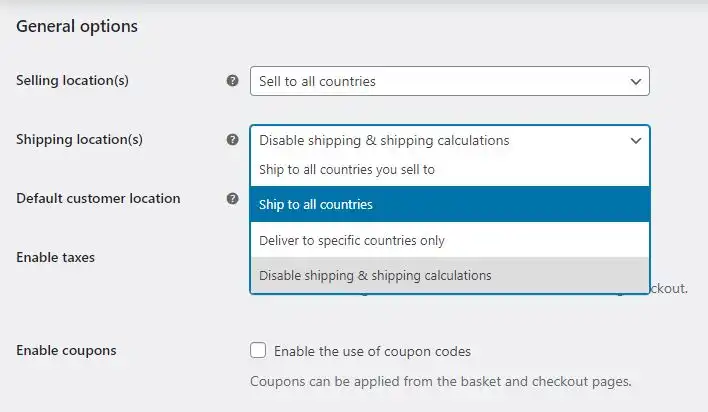
If you select the “Disable shipping & shipping calculations” option, you will not be able to configure the shipping charges and other settings.
If you select either of the rest of the options, click the Shipping Tab on the top, where you can set shipping zones, set fixed prices, offer free delivery, and enable the shipping calculator on the cart page.
Step 8: Get a WooCommerce Theme
Your store is all set, and you can start selling your products. However, you still need to make your online store attractive.
Your online store should portray what you are trying to sell. So, select a theme that suits your style. There are various WordPress themes that seamlessly integrate with WooCommerce to make your store look visually appealing.
- Check out our list of best WooCommerce themes.
You can also explore the latest and trending WooCommerce-compatible themes in WordPress theme marketplaces, such as ThemeForest, StudioPress, etc.
Whether you buy the theme or use a default WooCommerce theme, ensure that you have all the essential features and designs per your desire.
Step 9: Add Store Pages
Once the WooCommerce plugin is activated, it automatically adds essential store pages, which are as follows –
- Shop: This page on your website will display the items on sale on the web store.
- Cart: A cart would help your customers pick the items that they would like to buy.
- Checkout: This page would allow your customers to proceed with the payment and delivery processes.
- My Account: If you want your customers to visit your store repeatedly, a profile section would be necessary. It will keep their information saved for future use.
You can find these pages in your WordPress pages section. And in addition to these store pages, you can add other important pages like About, Contact, blog, and other legal pages. You can use WordPress page builder plugins like Elementor to customize the pages per your needs.
Here are our recommendations for designing store pages –
1. Shop Page: The shop page is where all the products you offer will be listed. You can access this page by adding “shop” at the end of the website URL. You can edit this page through the WordPress dashboard.
Customize this page to encourage visitors to visit your website regularly. You can play around with the themes and other page elements to figure out what looks intriguing.
Try different options for product placement, sorting, product images, and other aspects of this page.
2. Product Pages: A customer wants to know more about the product after finding the product they want. This is where the individual product pages come in.
In most cases, you don’t need to make significant adjustments to the product pages. Still, it would be a good idea to visit a few product pages and see if the information present is sufficient or not.
Ensure that the page looks complete and no blank spots are present, as they might confuse the visitors.
3. Shopping Cart: The third step in buying a product is the shopping cart. This page stores the products that the customers want to buy. Check if the page shows necessary information, such as the product image, product name, price, and quantity of the product. You can also add a section to enter coupon codes if you want to distribute coupons.
Keep the design of the Shopping Cart minimalistic and provide only the essential information to your customer.
4. Checkout page: The final and probably one of the most important pages of an online store is the checkout area. It is the page that allows your customers to choose the shipping address and the shipping options. It is also the page where the customers would make the payment. On this page, ensure that the pages don’t distract the users and provide a smooth medium to complete the transaction.
Step 10: Make Your Store User-friendly
Now, your WooCommerce store is ready for business, but is it prepared for the customers? At times, the customers might get overwhelmed with the design of the online store.
So, make adjustments to the website layout to make it customer-friendly. Here are some tips to help create an attractive and user-friendly online store.
- Keep the design simple. A simple and easy-to-navigate website would help customers reach the product they want more quickly.
- Grab their attention from the get-go. The center block would be the first thing that your customers would see. Customize it to grab the attention of your customers.
- Take a look at the sidebars, and adjust their numbers. Sometimes, not having a sidebar helps give the website a cleaner look.
- Navigation is crucial if you want your customers to return to your online store. Optimize your website’s layout so customers can find the product they want without hassle.
- Today most people use their phones to surf the web. So, don’t forget to optimize the website for mobile devices. WordPress takes care of that in most cases, but it would be a good idea to look at the website’s mobile layout.
Step 11: Install Essential Plugins
WooCommerce opens a doorway to some powerful plugins for your online store. You can add various payment gateways, shipping extensions, and more. Here are the most common WooCommerce extensions that you must add to your site –
- WooCommerce Tax (Free) – To configure how much taxes should be collected from customers by city, country, or state.
- WooCommerce Shipping (Free) – To print shipping labels right from your dashboard.
- Facebook for WooCommerce (Free) – To add your products on Facebook Shop and promote on the platforms.
- Omnisend – for marketing automation
- QuickBooks or Taxjar (Paid) – To financial account and tax management
Along with WooCommerce extensions, you’ll need to install WordPress plugins to add functionality and security to your site. Here are a few of the essential ones –
- AIOSEO – for SEO configuration and optimization
- UpdraftPlus – for automatic cloud backup
- WP Rocket – For speed optimization
- Sucuri – for website security
- WPForms – For contact forms and email subscription forms
- Elementor – To customize theme designs and build custom pages.
- OptinMonster – To create attractive pop-ups
- PushEngage – For Push notifications
You should also check out our list of best WooCommerce plugins to find some of the popular plugins and software that most successful WooCommerce stores are using.
Step 12: Launch your WooCommerce Store
Once you have installed all the essential plugins and configured them accordingly, your store is ready to live.
If you have created “coming soon,” replace it with your live site.
Congratulations! Your online store with WooCommerce is ready to take orders!
WooCommerce Store FAQs
Now, let’s look at some of the common questions we have been asked repeatedly by our clients and readers.
-
Is WooCommerce free?
Yes, WooCommerce is free forever. Since WooCommerce is an open-source, free eCommerce platform, you don’t have to pay a single penny to use it. It doesn’t even charge transaction fees or a percentage per sale.
-
Is WooCommerce good for beginners?
WooCommerce is an easy-to-use platform that doesn’t need technical knowledge to set up a basic store. You may need technical skills if you want advanced features and functionalities for your store.
-
How much does it cost to start a WooCommerce store?
WooCommerce is a free eCommerce platform. However, to set up a website, you will have to invest in a domain and hosting provider, which can cost as low as $2.95/month with Bluehost. It is the most affordable and reliable WooCoomerce hosting platform in the market.
-
Can I use WooCommerce for Dropshipping?
Yes, you can. In fact, WooCommerce is one of the best eCommerce platforms for dropshipping. It integrates seamlessly with popular dropshipping suppliers like Spocket, DSers, Printful, and many more via WordPress plugins.
-
Can I add a blog in WooCommerce?
Yes, you can. WooCommerce is based on WordPress, which is the best blogging platform. So, you can easily add blogs from the Posts section of the left sidebar of the dashboard and optimize them for SEO using WordPress SEO plugins for high ranking.
-
How can I get WooCommerce support?
WooCommerce is a free eCommerce platform. So, you will not get customer support from their team. However, if you use a WooCommerce managed hosting platform for your store, you can expect a high level of customer support from them.
More questions? Feel free to tweet us @ecomsutra, and we will try to help you in the best possible ways.
We hope this guide helped you launch your eCommerce store on WordPress successfully. After building your online store with WooCommerce, you should also check out our complete guide on WooCommerce SEO to optimize your online store to rank #1 on search result pages.